Showing posts with label latex. Show all posts

17 July 2014

585. Very briefly: use latex to combine .eps files into a single .eps

Say you have a figure made up by several smaller images by combining several includegraphics statements. Say also that you need to submit the figure as a single file when uploading the final version of your article.

The first step is to make sure that the output .ps file fits flush to the figure (see http://texblog.org/tag/fit-page-to-content/) using the standalone class:
 
\documentclass[varwidth=true, border=10pt, convert={size=640x}]{standalone} \usepackage[english]{babel} \usepackage{graphicx} \begin{document} \begin{figure}[h] \begin{center} \includegraphics[width=2.0cm]{figure_1a.eps} \includegraphics[width=2.0cm]{figure_1b.eps} \includegraphics[width=2.0cm]{figure_1c.eps} \\ \includegraphics[width=2.0cm]{figure_1d.eps} \includegraphics[width=2.0cm]{figure_1e.eps} \end{center} \end{figure} \end{document}
Then use ps2eps to turn the ps into an eps file:

ps2eps combined_image.ps

09 May 2014

574. Texmaker and texlive on windows xp

There are two ways of dealing with latex on windows -- either using native packages or via cygwin. Here's the  native approach, which I tested in a virtual machine with Windows XP SP2

 
1. Install texlive

Go to http://www.tug.org/texlive/acquire-netinstall.html and download http://mirror.ctan.org/systems/texlive/tlnet/install-tl.exe

Run the file. You'll now be taken through the installation of texlive. Note that the full installation is ca 3.7 Gb and it will take a few hours to download and install. On the other hand, space is cheap and most people (in academia) don't pay for bandwidth, so it's not a bad idea to do the full install.

Anyway, here are a few screenshots of the installation process:


It's a good idea to change the mirror to speed up the download


Uncheck TexWorks since we'll be installing TexMaker


This step can take many hours


Finally done.


2. Install texmaker

Go to http://www.xm1math.net/texmaker/download.html and download http://www.xm1math.net/texmaker/texmakerwin32_install.exe

The same file will work on XP, Vista and 8 (and presumably 7, which is more or less a patched version of Vista) and it will work on both 32 and 64 bit systems.

Install texmaker.


3. Configure  texmaker
Start texmaker

Go to Options/Configure Texmaker.

Under Commands you can select to use an external pdf viewer. Note that you will need to make sure that the path is correct -- in my case it was pointing to adobe reader 11, whereas I had adobe reader 9 installed. Easy enough to change, but you need to do it manually. The embedded/internal pdf viewer works ok, but distorts the text and figures somewhat (everything got a bit squashed)
Choose internal or external pdf viewer. Make sure the path is correct
Under Quick Build you can tick Latex+Bib(la)tex+Latex(x2)+dvips+ps2pdf+View pdf. NOTE: if you do this you won't be able to compile any file which hasn't got a \cite command and a mathing .bib file.

Alternatively, pick latex + dvips + ps2pdf + View pdf.

Quick Build -- pick the one with bibtex in it
Under Editor you can disable code completion (which can get annoying at times):

You can now load a tex file and hit F1 to compile it:


Quick test example

0. Create a folder called e.g. testtex
 
1. Download UCSD.eps from here: http://vectorlogotypes.net/logo/68332_UCSD.htm

Put it in the testtex folder.


2. Create the following anothertest.bib file in either texmaker or notepad:
@Article{2014:example,
  AUTHOR = {Placeholder, A},
  TITLE = {Comprehensive title},
  YEAR = 2014,
  JOURNAL = {J. Comp. Chem.},
  VOLUME ={45},
  PAGES = {100-101}
}
Put it in the testtex folder.

3. Create a new tex file in texmaker:


Make sure to tick graphicx

Basic tex file
Save to your testtex folder.

4. Edit your tex file as shown below::
\documentclass[10pt,a4paper]{article}
\usepackage[utf8]{inputenc}
\usepackage{amsmath}
\usepackage{amsfonts}
\usepackage{amssymb}
\usepackage{graphicx}

\usepackage{url}
\title{This is a test}

\begin{document}

\section{The test}
This is a simple test which consists of inserting a figure and adding a reference via bibtex. You can download the logo from \url{http://vectorlogotypes.net/logo/68332_UCSD.htm}. Put the UCSD.eps file in the same directory as your .tex file.
\begin{figure}
 \includegraphics{UCSD.eps}
 \caption{UC San Diego logo.}
 \label{fig:test}
\end{figure}

Here's a citation.\cite{2014:example}

\bibliography{anothertest}
\bibliographystyle{ChemEurJ}
\end{document}
5. Compile.
If you set up your F1 as shown above (i.e. with bibtex support), then all you need to do is hit F1. Otherwise, if you used the alternative setup, do F2 (latex), F11 (bibtex), F2 (latex), F11 (bibtex), F1 (compile and view).

14 March 2014

564.Very, very briefly: ps2pdf not working on jessie 12 March 2014

Update: see second comment below post.

ps2pdf example.ps produces

Error: /typecheck in /findfont
Operand stack:
   -66.7   --nostringval--   0   --nostringval--   --nostringval--   {}
Execution stack:
   %interp_exit   .runexec2   --nostringval--   --nostringval--   --nostringval--   2   %stopped_push   --nostringval--   --nostringval--   --nostringval--   false   1   %stopped_push   1910   1   3   %oparray_pop   1909   1   3   %oparray_pop   1893   1   3   %oparray_pop   1787   1   3   %oparray_pop   --nostringval--   %errorexec_pop   .runexec2   --nostringval--   --nostringval--   --nostringval--   2   %stopped_push   --nostringval--   --nostringval--   --nostringval--   --nostringval--   %array_continue   --nostringval--   1868   6   6   %oparray_pop
Dictionary stack:
   --dict:1164/1684(ro)(G)--   --dict:0/20(G)--   --dict:78/200(L)--   --dict:196/300(L)--   --dict:44/200(L)--   --dict:194/256(L)--
Current allocation mode is local
Current file position is 393007
GPL Ghostscript 9.05: Unrecoverable error, exit code 1
The workaround is to remove the package  fonts-font-awesome, which will remove texlive-fonts-extra. As far as I understand a fix is included upstreams and will work its way down to Jessie eventually.

17 December 2013

535. Briefly: ACS journal latex template -- achemso

There's no outright template for the preparation of tex files for ACS journals. However, there are two files provided: a bibtex styles file, achemso.bst, and a macro file, achemso.cls. Both are available in the texlive-latex-extra package on debian.

Luckily there's a lot of information online, including a demo file: ftp://ftp.dante.de/tex-archive/biblio/bibtex/contrib/achemso/

Anyway, here's a simple file that can act as a template. Have a look at the demo file at ftp.dante.de for a much more exhaustive example, including how to use schemes and insert references.

You can figure out the journal abbreviations from their URLs. Otherwise, page 4 in this pdf has a list: http://www.tug.org/texlive/Contents/live/texmf-dist/doc/latex/achemso/achemso.pdf

Anyway:

\documentclass[journal=inoraj, layout=twocolumn]{achemso}
\usepackage[latin1]{inputenc}
\usepackage[english]{babel}
\usepackage{amsmath}
\usepackage{amsfonts}
\usepackage{amssymb}
\usepackage{graphicx}
\author{Vera Hill}
\affiliation{Department of Chemistry, This University, This Country}
\email{my@email}
\author{I. Lindqvist}
\affiliation{Department of Chemistry, Another University, That Country}
\title{A quick, non-exhaustive tex template}

\begin{document}
\maketitle

%\begin{tocentry} %graphical TOC
%\includegraphics{example.eps}
%TOC text goes here
%\end{tocentry}

\begin{abstract}
The ACS should provide a simple template. They don't, so I do.
\end{abstract}

\section{Introduction}
\section{Results and Discussion}

%\begin{figure}
% \includegraphics{graphic}
% \caption{A figure}
% \label{fig:example}
%\end{figure}


\subsection{References}
\section{Experimental}
\begin{acknowledgement}
VH thanks the internet. IL thanks the electron.
\end{acknowledgement}

\begin{suppinfo}
See supporting information for additional experimental details.
\end{suppinfo}

\end{document}

Example:

23 February 2013

343. 'track changes' in LaTeX: collaborative writing

While I find latex superior to word processors in almost every single aspect, there is one thing I have to admit that MS/Libre/Open Office have over LaTeX: track changes. Since LaTeX is nothing but code you can obviously use something like git or svn to manage versions of .tex code. There are some differences though -- e.g. git would show you the diff output, but not necessarily the context of the changes, and I'm having a difficult enough time convincing people to use LaTeX without having to worry about setting up a git server as well (I can obviously cheat around it by running a local git server, downloading their file and push it to my git server etc, but then I would be the only one who'd be able to track the changes. Also, it's not elegant).

I have a student who is currently preparing a thesis, and while I've managed to give most of my feedback via the pdf annotation function in mendeley, it doesn't feel natural when it should be a simple matter of editing the .tex directly (yet in a way that leaves the student in control over whether to accept or reject the changes).

So here's an exploration of three different ways of passing comments and corrections back and forth when using LaTeX.

I'm also not the first one to ask this question. See e.g. http://tex.stackexchange.com/questions/3653/what-is-the-best-way-to-track-changes-with-non-computer-people

1. Make a pdf and annotate it
 This is a simple and straightforward method for passing comments back and forth. It is not a very convenient method for making any substantial changes though. On top of that, linux does not currently have any particularly useful program for annotating pdf files. See here: http://verahill.blogspot.com.au/2013/02/338-annotating-pdfs-in-linux-revisited.html for more information.

Quite apart from the lack of tool, I really want to emphasize that making small annotations is not a replacement for a tool that allows you to really stir up the text.

2. Using git
You can easily set up your own git server and use that for versioning. http://verahill.blogspot.com.au/2013/01/324-setting-up-private-git-server.html

You can see the version differences using a couple of methods, but gitk might be the easiest one. The downside with this is that you lose some of the context of the changes. Also, it shows you the code that was changed, the changes in the final document (e.g. formatting, figures etc.).

Still it's a pretty intuitive and easy way of tracking changes -- and in terms of versioning it is certainly the best solution. You can fork, roll back and generally have a perfect account of how the document has evolved.
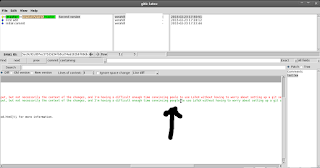
git in particular makes it easy to see added code

In terms of small changes like fixing typos it is a lot more subtle though


3. latexdiff
latexdiff is an easy to use tool that's in the debian repos. Simply do
latexdiff version1.tex version2.tex > diff.tex

and then open diff.tex and compile it to see the changes.

Pleasantly suprised


4. Other solutions
there are plenty of solutions for introducing mark-up directly into the tex document, like trackchanges, changes etc. I've used them in the past but it lack elegance when doing heavier collaborative writing.

Thoughts

I can't help but think that the best solution is to combine git with latexdiff -- or even a special fork of git that uses latexdiff.

Googling shows that apparently I"m not the only one who thinks so: http://gitorious.org/git-latexdiff#more as well as http://tex.stackexchange.com/questions/1325/using-latexdiff-with-git
I haven't actually tested any of those methods yet, and it still more or less requires a common git server.

11 April 2012

116. [Solved] Latex bug -- "tcfmgr: config file `tcfmgr.map' (usually in $TEXMFMAIN/texconfig) not found."


Symptom:
When using latexila or texmaker no dvi/ps/pdf is generated. No outright error is report though

When trying to generate the pdf in the terminal using latex e.g.

me@beryllium:~$ latex nature_draft.tex
This is pdfTeX, Version 3.1415926-1.40.10 (TeX Live 2009/Debian)
kpathsea: Running mktexfmt latex.fmt
tcfmgr: config file `tcfmgr.map' (usually in $TEXMFMAIN/texconfig) not found.
I can't find the format file `latex.fmt'!
 kpsewhich -expand-var='$TEXMFMAIN'
gives
/usr/share/texmf/

which is the correct file structure as defined by texmf.cnf

kpsewhich texmf.cnf
/usr/share/texmf/web2c/texmf.cnf

So what the heck is going on? I've written articles, reviews and book in latex and never had a problem until now. Also, it only happens on one computer.

Solution:
I ended up just fooling around. What solved it was doing
sudo texconfig rehash
mktexlsr: Updating /var/lib/texmf/ls-R-TEXMFMAIN...
mktexlsr: Updating /var/lib/texmf/ls-R-TEXLIVE...
mktexlsr: Updating /var/lib/texmf/ls-R...
mktexlsr: Done.
That's all. Really.

Minor note:
you can run texonfig interactively as well. Just make sure to run it using sudo.


Links to this post:
http://tex.stackexchange.com/questions/64894/error-i-cant-find-the-format-file-pdflatex-fmt

21 December 2011

37. Making posters in latex


As a scientist you may have discovered how much less swearing occurs when writing articles in latex rather than MS Word or other What You See Isn't Quite What You Wanted  packages (WYSIQWYW -- I guess this is an acronym that won't be taking off anytime soon). The next step is to move from using powerpoint to make posters and presentations, to using latex.

It's never elegant to post the entire code in blog form, but what to do when you can't upload simple files?

The poster style is based on a theme by Rob J Hyndman and is an adapation of i6dv by David Vilar and edited by me.


Here's beamerthemeMyTheme.sty which you should put in the same folder as your post tex file:


\ProvidesPackage{beamerthemeMyTheme} % this style was created by Rob J Hyndman and is an adapation of i6dv by David Vilar. Edited by Someone Else

%%%%%%%%%%%%%%%%%%%%%%%%%%%%%%%%%%%%%%%%%%%%%%%%%%%%%%%%%%%%%%%%%%%%%%%%%%%%%%%%%%%%%%%%%%%%%%%%%%%%
%\selectcolormodel{cmyk}
\selectcolormodel{rgb}
\mode<presentation>

%%%%%%%%%%%%%%%%%%%%%%%%%%%%%%%%%%%%%%%%%%%%%%%%%%%%%%%%%%%%%%%%%%%%%%%%%%%%%%%%%%%%%%%%%%%%%%%%%%%%

% custom colors
%\definecolor{i6blue}{cmyk}{1,0.305,0,0.06}
\definecolor{i6bluedark}{rgb}{0.0156,0.2578,0.5625} 
\definecolor{i6colorscheme1}{HTML}{333333}  %333333 e.g. for block title
\definecolor{i6colorblockbg}{HTML}{555555}
\definecolor{i6colorblockfg}{HTML}{FFFFFF} %block title white
\definecolor{i6colorscheme2}{HTML}{000000}  % e.g. title in headline
\definecolor{i6colorscheme3}{HTML}{F0F0F0} % e.g. for poster background
\definecolor{i6colorscheme4}{HTML}{000000} 
\definecolor{i6colorschemeHeadline}{HTML}{000000}  % for headline bg
\definecolor{i6colorschemeFootline}{HTML}{101010}  % for headline bg

% headline colors and fonts
\setbeamercolor{headline}{fg=yellow,bg=i6colorschemeHeadline}
\setbeamercolor{title in headline}{fg=yellow}
\setbeamercolor{author in headline}{fg=white}
\setbeamercolor{institute in headline}{fg=lightgray}
\setbeamercolor{separation line}{bg=i6colorscheme1}

% footline colors and fonts
\setbeamercolor{footline}{fg=white,bg=i6colorschemeHeadline}
\setbeamerfont{footline}{fg=white, size=\normalsize}

% body colors and fonts
\setbeamercolor*{normal text}{fg=black,bg=i6colorscheme3}

% block environment
\setbeamercolor*{block body}{bg=white,fg=black}
\setbeamercolor*{block title}{fg=i6colorblockfg,bg=i6colorblockbg}
\setbeamerfont{block title}{size=\large,series=\bf}

% example environment
\setbeamercolor*{example title}{fg=white,bg=i6colorscheme1}
\setbeamerfont{example title}{size=\large,series=\bf,bg=i6colorscheme1,fg=white}

\setbeamercolor{alerted text}{fg=i6colorscheme1}

\setbeamertemplate{itemize items}[triangle]
\setbeamertemplate{navigation symbols}{}  % no navigation on a poster

%%%%%%%%%%%%%%%%%%%%%%%%%%%%%%%%%%%%%%%%%%%%%%%%%%%%%%%%%%%%%%%%%%%%%%%%%%%%%%%%%%%%%%%%%%%%%%%%%%%%
\setbeamertemplate{block begin}{
  \vskip0.5ex %space between boxes
  \begin{beamercolorbox}[rounded=true,shadow=true,leftskip=1ex,colsep*=0.5ex]{block title}%colsep - height block title, leftskip - title text indent
    \usebeamerfont*{block title}{\Large \insertblocktitle}
  \end{beamercolorbox}%
  {\ifbeamercolorempty[bg]{block body}{}{\nointerlineskip\vskip-0.5pt}}%space between head and block
  \usebeamerfont{block body}%
%  \begin{beamercolorbox}[rounded=true,shadow=true,colsep*=0.5ex,sep=0.5ex,vmode]{block body}%colsep, sep - vert margin top and bottom
  \begin{beamercolorbox}[rounded=true,shadow=true,colsep*=0.5ex,sep=0.5ex,vmode]{block body}%colsep, sep - vert margin top and bottom
   \ifbeamercolorempty[bg]{block body}{\vskip-.25ex}{\vskip-.5ex}\vbox{}%
  }
  \setbeamertemplate{block end}{
  \end{beamercolorbox}
}

%%%%%%%%%%%%%%%%%%%%%%%%%%%%%%%%%%%%%%%%%%%%%%%%%%%%%%%%%%%%%%%%%%%%%%%%%%%%%%%%%%%%%%%%%%%%%%%%%%%%
\setbeamertemplate{headline}{  
  \leavevmode

  \begin{beamercolorbox}[wd=\paperwidth]{headline}
\centering
        \vskip4ex % height above text
        \usebeamercolor{title in headline}{\color{fg}\textbf{\LARGE{\inserttitle}}\\[1ex]}
        \usebeamercolor{author in headline}{\color{fg}\large{\insertauthor}\\[1ex]}
        \usebeamercolor{institute in headline}{\color{fg}\large{\insertinstitute}\\[1ex]}
  \end{beamercolorbox}

  \begin{beamercolorbox}[wd=\paperwidth]{lower separation line head}
    \rule{0pt}{2pt}
  \end{beamercolorbox}
}

%%%%%%%%%%%%%%%%%%%%%%%%%%%%%%%%%%%%%%%%%%%%%%%%%%%%%%%%%%%%%%%%%%%%%%%%%%%%%%%%%%%%%%%%%%%%%%%%%%%%
\setbeamertemplate{footline}{
  \begin{beamercolorbox}[wd=\paperwidth]{upper separation line foot}
    \rule{0pt}{2pt}
  \end{beamercolorbox}
  
  \begin{beamercolorbox}[ht=5ex,leftskip=1cm,rightskip=1cm]{footline}% ht - thickness
    \hfill \raisebox{0.4cm}{\insertfooter} %raisebox - placement of text
    \vskip1ex
  \end{beamercolorbox}

  \begin{beamercolorbox}[wd=\paperwidth]{lower separation line foot}
    \rule{0pt}{0pt}
  \end{beamercolorbox}
}
%%%%%%%%%%%%%%%%%%%%%%%%%%%%%%%%%%%%%%%%%%%%%%%%%%%%%%%%%%%%%%%%%%%%%%%%%%%%%%%%%%%%%%%%%%%%%%%%%%%%
\mode<all>

\def\footer#1{\def\insertfooter{#1}}


and here's the poster.tex file:


\documentclass[final]{beamer}
\usetheme{MyTheme}
\usepackage[orientation=portrait,size=a1,scale=1.14,grid,debug]{beamerposter}
\usepackage[absolute,overlay]{textpos}
\setlength{\TPHorizModule}{1.0cm}
\setlength{\TPVertModule}{1.0cm}
\usepackage{ragged2e}
\usepackage{mhchem}
\usepackage{caption}
\captionsetup{labelformat=empty,labelsep=none}


\title{A hypothetical LaTeX poster}
\author{I Am Me\inst{*} \quad She S Someoneelsei\inst{\dag} \quad A. Third Party\inst{\dag}$^{,}$\inst{\ddag}}
\institute[School of Somethingorother]{
\inst{*}%
School of Somethingorother, My University \quad
\inst{\dag}%
Department of Haxx0r
\inst{\ddag}%
Department of 1337, UC Other
}
\footer{url: http://http://www.blogger.com/ \quad email: me@blogger.com}
\date{}

\begin{document}

\begin{textblock}{6}(0.6,0.6)
\includegraphics[height=4.0cm]{mylogo_light.eps}
\end{textblock}

\begin{textblock}{6}(54.9,0.6)
\includegraphics[height=4.0cm]{ucother_logo.eps}
\end{textblock}

\begin{frame}{} 
\begin{textblock}{28.5}(0.6,6.3)

\begin{block}{Introduction}
\justifying
\begin{center}\begin{minipage}{28cm}
Lorem ipsum dolor sit amet, consectetur adipiscing elit. Vestibulum gravida nisi eget lectus commodo luctus. Pellentesque vitae velit ligula. Nullam diam enim.[1,2]
\end{minipage}\end{center}
\begin{center}
\begin{figure}
\includegraphics[width=23.9cm]{screenshot.eps}
\caption{A caption for  \ce{[Fe4(H2O)8L9]^{-}}}
\end{figure}
\end{center}
\begin{center}\begin{minipage}{28cm}
Integer nec felis massa, ac tincidunt tellus. Phasellus ornare urna nec erat eleifend eu egestas arcu sodales. Cras interdum, lectus vitae ultricies rutrum, orci sapien bibendum orci, ut facilisis lectus velit at risus. Maecenas ut nisi mi. Praesent in nunc vitae justo ullamcorper placerat nec id lectus.  \ce{[[Fe4(H2O)8L9]^{-}} cluster[3]ante ipsum primis {\sc nmr}.[4]\\
\tiny{
\begin{enumerate}
\item G. Romanum, J. Eunt, G. Ite, F. Sum, \emph{A. Journal. Int. Ed.} \textbf{2011}, \emph{8}, 1943--1946.\\
\item A. Graecum, D. Hispanum, F. Molybdenum, R. Verum, H. Ipsum, P. J. Consectetur, G. Lectus, R. Ligula, M. Diam, \emph{Science} \textbf{2011}, \emph{323}, 13--17.
\end{enumerate} }
\end{minipage}\end{center}

\end{block}

\begin{block}{Experimental} \justifying

\begin{center}
\begin{figure}
\includegraphics[width=23.6cm]{screenshot.eps}
\caption{Another figure caption}
\end{figure}
\end{center}

\begin{center}\begin{minipage}{28cm}
Integer nec felis massa, ac tincidunt tellus. In eget lectus a ante hendrerit gravida ut a massa. Nam euismod nisi vel nulla suscipit fermentum. Quisque vel nulla nibh, at bibendum quam. Vestibulum ante ipsum primis in faucibus orci luctus et ultrices posuere cubilia Curae; Nunc tempor pretium blandit. Nulla vulputate odio quis tortor porttitor rhoncus. Vestibulum euismod purus non dolor pharetra non tempus diam pharetra. Nulla nec mauris vitae risus dapibus eleifend eget et ipsum. Pellentesque habitant morbi tristique senectus et netus et malesuada fames ac turpis egestas. Donec aliquam fringilla nulla, et ornare urna blandit id. In blandit lacinia massa quis tempus. Cras vel feugiat mi. Nullam risus nunc, aliquam non facilisis sit amet, condimentum id felis.  \end{minipage}\end{center}
\end{block}


\begin{block}{Data massage} \justifying
\begin{center}\begin{minipage}{28cm}
In eget lectus a ante hendrerit gravida ut a massa. Nam euismod nisi vel nulla suscipit fermentum. Quisque vel nulla nibh, at bibendum quam. Vestibulum ante ipsum primis in faucibus orci. In eget lectus a ante hendrerit gravida ut a massa. Nam euismod nisi vel nulla suscipit fermentum. Quisque vel nulla nibh, at bibendum quam. 

\end{minipage}\end{center}
\end{block}


\end{textblock}


%%%%%%%%%%%%%%%%%%%%%%%%%%%%%%%%%%%%%%%%%%%%%%%%

\begin{textblock}{28.5}(30,6.3)

\begin{block}{Data reduction} \justifying
\begin{center}\begin{minipage}{28cm}
 Donec aliquam fringilla nulla, et ornare urna blandit id. In blandit lacinia massa quis tempus. Cras vel feugiat mi. Nullam risus nunc, aliquam non facilisis sit amet, condimentum id felis.\end{minipage}\end{center}
 
\begin{table}
\begin{tabular}{c c}
\begin{minipage}{14cm} 
\begin{center}
\begin{figure}
\includegraphics[width=10.0cm]{adobe.eps}
\caption{A caption}
\end{figure}
\end{center}
\end{minipage} 
&
\begin{minipage}{14cm}
\begin{figure}
\includegraphics[width=10.0cm]{adobe.eps}
\caption{A caption.}
\end{figure}
\end{minipage}

\end{tabular} \end{table}  
\begin{center}\begin{minipage}{28cm}
Donec aliquam fringilla nulla, et ornare urna blandit id. In blandit lacinia massa quis tempus. Cras vel feugiat mi. Nullam risus nunc, aliquam non facilisis sit amet, condimentum id felis.\end{minipage}\end{center}  
 
\begin{center}
\begin{figure}
\includegraphics[width=12.6cm]{screenshot.eps}
\caption{Map of $\displaystyle \sum_{i}^{}(A(\lambda_{i})_{obs.}-A(\lambda_{i})_{calc.})^{2}$ as a function of pK$_{\textrm{a}}$s}
\end{figure}
\end{center}

\end{block}

\begin{block}{Fringilla nulla}
\justifying
Donec aliquam fringilla nulla, et ornare urna blandit id. In blandit lacinia massa quis tempus. Cras vel feugiat mi. Nullam risus nunc, aliquam non facilisis sit amet, condimentum id felis. $\displaystyle \frac{1}{T_{2r}}\approx\frac{C_{m}}{C_{aq}} \cdot k$:
\begin{eqnarray}
-\Delta H^{\ddag} \frac{1}{T} + \Delta S ^{\ddag}&=& R \cdot ln (\frac{\pi}{p_{m}}\frac{h}{k_{b}}\frac{1}{T}\Delta \nu) \nonumber
\end{eqnarray}

\begin{table}
\begin{tabular}{c c}
\begin{minipage}{14cm}
\begin{center}
\begin{figure}
\includegraphics[width=12.6cm]{screenshot.eps}
\caption{Observed $\Delta$H$^{\ddag}$ as a function of pH.}
\end{figure}
\end{center}
\end{minipage}
&
\begin{minipage}{14cm}
\begin{center}
\begin{figure}
\includegraphics[width=12.6cm]{screenshot.eps}
\caption{Observed $\Delta$S$^{\ddag}$ as a function of pH.}
\end{figure}
\end{center}
\end{minipage}
\end{tabular} \end{table}
\begin{center}\begin{minipage}{28cm}
 Ut ultrices ipsum vitae ipsum sagittis eget egestas dui interdum. 
\end{minipage}\end{center}
\end{block}

\begin{block}{Summary}
\begin{center}\begin{minipage}{28cm}
\begin{itemize}
\item Ut ultrices ipsum vitae ipsum sagittis eget egestas dui interdum. Phasellus nec nisl quam. 
\end{itemize}
\end{minipage}\end{center}
\end{block}

\begin{block}{Acknowledgements} \justify
\begin{center}\begin{minipage}{28cm}
Ut ultrices ipsum vitae ipsum sagittis eget egestas dui interdum. \\
Phasellus nec nisl quam. \\
\end{minipage}\end{center}
\end{block}


\end{textblock}
\end{frame}
\end{document}